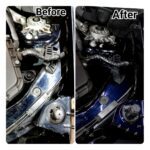
Having a clean engine can make any car look its best, but getting it professionally detailed isn’t always an option. Fortunately, there’s an easy and cost-effective way to get that professional-quality finish at home: DIY engine detailing.
With the right tools and techniques, you can have your car looking like new in no time. In this article, we’ll take a closer look at the process of DIY engine detailing and explore some tips for achieving the perfect finish.
We’ll also provide an overview of what materials are needed and how to use them in order to ensure a successful project. So if you’re ready to give your car the showroom treatment it deserves, keep reading!
1.) Gather The Necessary Materials
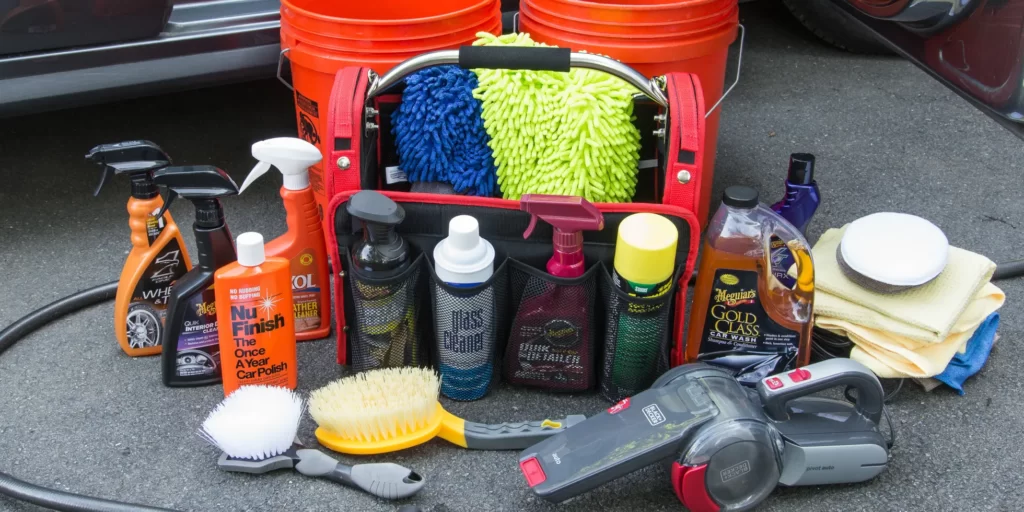
Gaining knowledge about the materials and tools necessary for engine detailing is an important step in achieving a professional-quality finish at home.
Researching the best products, including cleaners, waxes, degreasers, and polishes, can be time-consuming. However, taking this extra step will ensure that your engine detailing project looks as good as possible when it’s complete.
When choosing the products you’ll use for your DIY engine detailing project, read reviews and compare prices to get the best deal.
It’s also wise to look for products designed specifically for DIY engine detailing projects, so you know they’ll do the job effectively.
Transitioning into the next section, preparing the area and engine before beginning any work is essential.
2.) Prepare The Area And The Engine
Before beginning a DIY engine detailing project, it is essential first to prepare the area and the engine. This will help ensure a professional-quality finish at home. Here are some detaling tips for setting up:
- Gather all necessary cleaning tools, such as rags, brushes, degreasers, and wax.
- Make sure to check your car’s manual for coating options that are suitable for your specific make and model.
- Cover any exposed electronics with plastic bags or towels to protect them from any liquids or debris that may be used in the detailing process.
- Remove any dirt or debris from around the engine bay before starting work on the engine itself.
By taking these steps, you can help minimize potential problems throughout the cleaning process and ensure that you get a great finish when you’re done.
After ensuring that both the area and the engine are properly prepared, it’s time to move on to washing and drying.
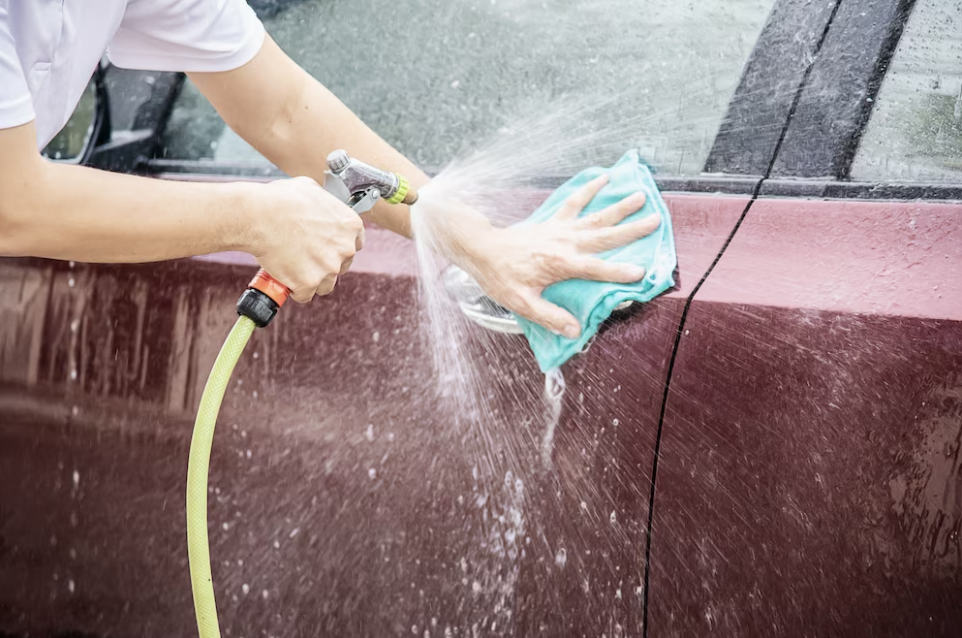
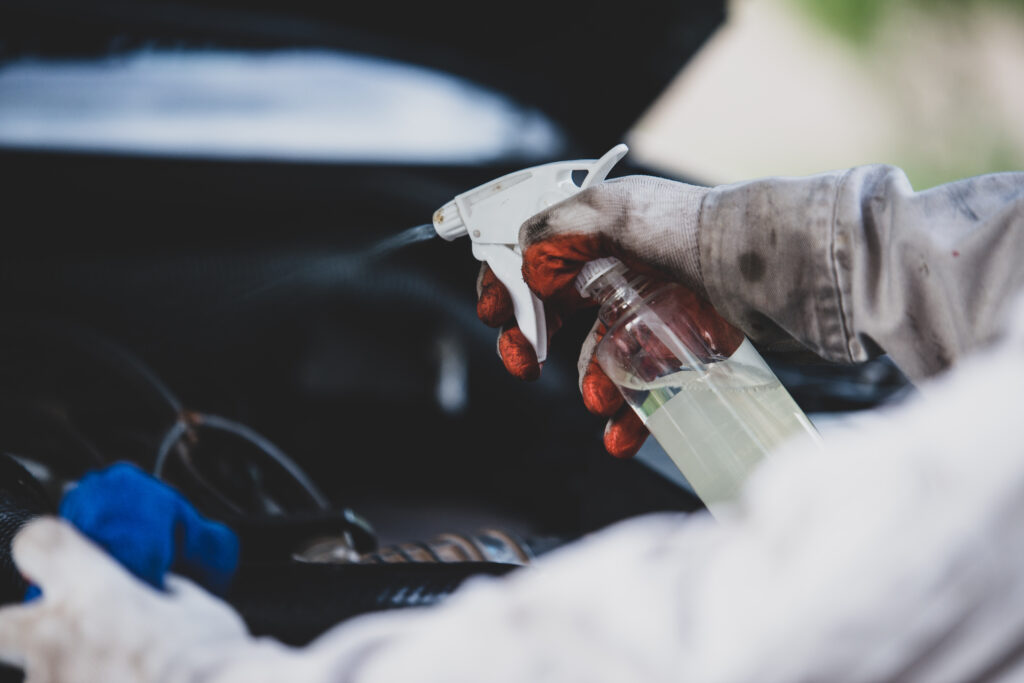
3.) Wash And Dry
Getting your car engine ready for a professional-grade detailing job starts with washing and drying.
To get the most out of these steps, you’ll want to make sure you’re using the right cleaning supplies and following the best degreasing techniques. It’s important to choose the right cleaner for your engine; look for one that is specifically designed for automotive engines and has a neutral pH balance so that it won’t damage any seals or gaskets. You’ll also want to make sure you select a cleaner that won’t leave behind a residue after being rinsed off.
Once you’ve chosen the appropriate cleaner, use it to degrease all parts of your engine thoroughly. A good trick is to use an old toothbrush or soft brush to help remove dirt and grime from hard-to-reach places.
When you’re finished degreasing, rinse off all surfaces with clean water and then use a microfiber cloth or towel to dry them off. Be sure to use gentle motions as you wipe everything down; if any debris gets left behind, it can cause scratches or other imperfections in your engine’s finish. Make sure everything is completely dry before moving on to polishing and protecting your engine!
Transitioning into this step will give your DIY engine detailing an even more professional-quality look when you’re finished.
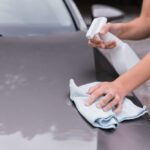
4.) Polish And Protect
Dusting is the first step to achieving a professional-quality finish at home. With the right brush and a few quick, careful strokes, you can easily remove any dirt or dust that has accumulated on your engine.
When it comes to polishing techniques, it’s important to use a high-quality wax or polish that won’t damage the engine’s surfaces. Make sure to apply in circular motions to ensure an even coat, and let it sit for several minutes before wiping it off with a clean cloth. This will help create a protective layer and give your engine an extra shine.
Next, it’s time to restore and finalize your DIY engine detailing project. This can be done with some light buffing using a soft cloth and some elbow grease. Buffing helps remove any remaining oxidation and prevent future rust buildup by creating an additional layer of protection against moisture and other elements.
Additionally, adding carnauba wax will not only bring out the engine’s natural beauty but also add an additional layer of protection that lasts longer than regular waxes or polishes.
With these simple steps, you can easily take your DIY engine detailing project from start to finish, leaving your engine looking like new!
5.) Restore And Finalize

Once the engine has been cleaned and degreased, it is time to restore and finalize the look.
The first step is to refinish the surfaces. To do this, use a paint or coating product designed for engines. Make sure to follow the instructions on the product container carefully.
If there are any rust spots, use a rust remover to get rid of them. Once all of the surfaces have been refinished and any rust removed, it’s time to put everything back together.
Reassemble all of the parts according to the instructions in your car’s manual. Make sure that everything fits and works properly before moving on. This may require some trial and error as you go along, but taking your time will ensure that you don’t make any mistakes that can cause damage down the road.
When you are finished reassembling, give everything one last check-over to make sure everything is working properly.
Once you are satisfied with how it looks and functions, your DIY engine detailing project is complete! You should now be proud of yourself for achieving a professional-quality finish at home with your own two hands!
Frequently Asked Questions
What Type Of Engine Detailing Products Should I Use?
When it comes to engine detailing, there are a few key products you should use to get a professional-quality finish.
Oil removal is essential – look for degreasers that can break down tough grime and oil build up.
You’ll also need something to protect the engine after cleaning, like a wax or silicone sealant.
Make sure you follow the instructions on all products carefully to ensure your engine looks its best.
How Long Should I Spend On Each Step Of The Engine Detailing Process?
When engine detailing, it’s important to take your time and follow safe practices.
Depending on the size of the engine and how much dirt and grime has built up, you should expect to spend anywhere from an hour to several hours in order to get a professional-quality finish.
Be sure to use the right cleaning techniques and products for the job, such as engine degreasers and brush kits. Additionally, wear protective gloves and safety glasses while handling any chemicals.
With patience and care, you can achieve a professional-quality finish at home.
How Often Should I Detail My Engine?
Engine detailing is a great way to keep your vehicle running like new and maintain its value. Ideally, it should be done on a regular basis as part of your preventative maintenance routine.
However, the frequency of how often you detail your engine depends on many factors such as the type of engine, driving habits, and any engine additives you may use.
Generally speaking, most engines require an engine detail at least once per year, or every 10,000 miles.
How Can I Protect My Engine From Future Wear And Tear?
Protecting your engine from future wear and tear can be achieved by taking the proper steps.
Regular maintenance such as oil changes and tune-ups are essential, while proper lubrication helps to keep parts in good working order.
Additionally, using protective materials inside the engine bay can also help prevent corrosion and other damage caused by everyday road use.
Taking these steps will help ensure your engine lasts for many years to come.
What Type Of Brush Should I Use To Clean The Engine?
When it comes to cleaning your engine, proper technique and preventive maintenance is key.
To ensure the best results, use a soft-bristled brush that is specifically designed for engine cleaning.
Avoid using hard brushes or wire brushes as they may scratch and damage the engine’s surface.
A soft bristle brush will help you get rid of dirt and grease while keeping the engine looking its best.
Conclusion
In conclusion, DIY engine detailing can be a great way to keep your car running like new. With the right products and techniques, you can achieve a professional-quality finish at home.
Make sure you use appropriate brushes to clean the engine and protect it from future wear and tear with regular detailing.
It’s a rewarding experience to take care of your car by yourself – plus, you get the satisfaction of a job well done! With some patience and dedication, you’ll have an engine that looks as good as new in no time.