So, you want to become a master of hand waxing, huh? Well, you’ve come to the right place!
In this step-by-step guide, we’ll walk you through the art of hand waxing, giving you all the tips and tricks you need to achieve that perfect shine for your car.
No need to worry about complicated processes or expensive equipment – we’ll show you how to do it all by hand.
From gathering the necessary materials to maintaining the waxed surface for long-lasting protection, we’ve got you covered.
Get ready to impress your friends and neighbors with your expert waxing skills.
Let’s dive in and become a true master of the art of hand waxing!
Gathering the Necessary Materials
To gather the necessary materials for hand waxing, you’ll need a few essential items. First, it’s crucial to choose the right wax for your car. Look for a high-quality car wax that suits the type of paint on your vehicle. Consider factors such as durability, ease of application, and protection against UV rays.
Next, familiarize yourself with proper hand waxing techniques. Start by thoroughly washing and drying your car to remove any dirt or debris. Apply the wax using a clean microfiber cloth, working in small sections at a time. Use circular motions to evenly distribute the wax and ensure full coverage.
As you finish gathering your materials, you can transition into the next step: preparing the car’s surface for waxing.
Preparing the Car’s Surface
Before beginning the hand waxing process, start by thoroughly cleaning the car’s surface. This step is crucial to ensure that the wax adheres properly and provides maximum protection. To prepare the car’s surface, you need to remove any old wax and dirt. Use a specialized wax remover to effectively eliminate the old wax and provide a clean canvas for the new wax. When it comes to proper cleaning techniques, follow these guidelines:
| Cleaning Technique | Description |
|---|---|
| Wash with soap and water | Use a car wash soap and a sponge or microfiber cloth to gently wash the entire car. Rinse thoroughly to remove all soap residue. |
| Clay bar treatment | Use a clay bar to remove embedded contaminants like tree sap, bugs, or tar. Lubricate the surface with a clay lubricant and gently glide the clay bar over the car’s surface. |
| Dry the car | Use a soft, lint-free towel to dry the car completely, ensuring no water spots are left behind. |
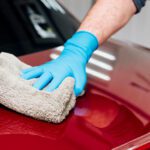
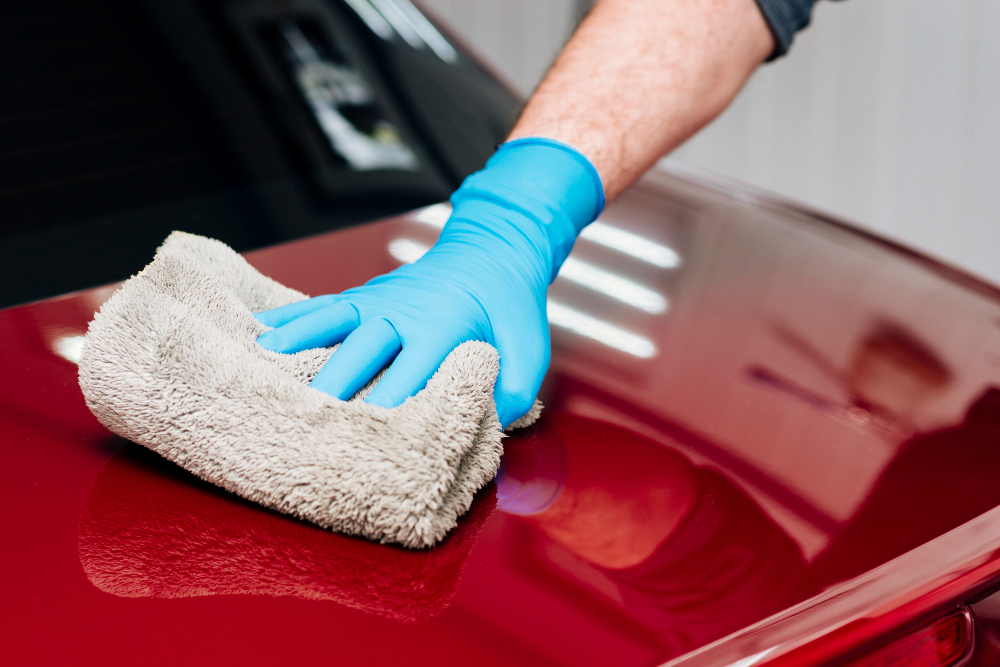
Applying the Wax by Hand
Start by applying the wax to the car’s surface using a circular motion. This technique ensures even coverage and helps the wax bond to the paint.
There are several pros to applying wax by hand. Firstly, it allows you to have more control over the application, ensuring that every part of the car is covered. Secondly, it gives you the opportunity to inspect the car’s surface closely for any imperfections or areas that may need special attention.
However, there are also some cons to consider. Applying wax by hand can be time-consuming, especially if you have a large vehicle. Additionally, it requires physical effort and can be tiring.
To achieve the best results, make sure to use a clean, lint-free cloth or applicator pad and apply the wax in thin, even layers.
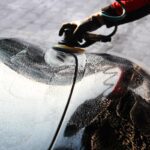
Buffing and Polishing for a Glossy Finish
After applying the wax by hand, it’s time to buff and polish the car’s surface for a glossy finish. To achieve the best results, follow these tips:
- Choosing the right buffing pads: Different pads have different levels of aggressiveness, so it’s important to select the appropriate one for your specific needs. For light oxidation or minor blemishes, a foam pad is usually sufficient. For deeper scratches or swirl marks, a wool pad may be more effective.
- Tips for achieving a swirl-free finish: To prevent swirl marks, always work in small sections and use slow, overlapping motions. Apply even pressure and avoid applying too much wax or polish. Additionally, regularly clean and replace your buffing pads to ensure they remain in good condition.
Maintaining the Waxed Surface for Long-Lasting Protection
To ensure long-lasting protection for your freshly waxed car, proper maintenance is essential. This includes removing any build-up of old wax residue on the surface. To remove this residue, you can use a pre-wax cleaner or a mixture of warm water and mild soap. Simply apply the cleaner to a microfiber cloth and gently rub the affected areas in circular motions. Remember to rinse the cloth frequently to avoid spreading the residue.
Once the old wax is removed, it’s important to regularly maintain the waxed surface. This involves washing your car regularly to remove dirt and grime that can degrade the wax. It’s also important to avoid parking your car under direct sunlight for extended periods, as this can cause the wax to melt and lose its protective properties.
Conclusion
In conclusion, mastering the art of hand waxing is an effective way to protect and enhance the appearance of your car’s surface. By following the step-by-step guide, gathering the necessary materials, and properly applying the wax by hand, you can achieve a glossy finish that lasts.
Don’t forget to regularly maintain the waxed surface for long-lasting protection. Enjoy the satisfaction of a beautifully waxed car!