Are you ready to unlock the true radiance of your car?
In ‘Revive Your Ride: Discover the Art of Hand Waxing and Unleash the Hidden Brilliance of Your Car!’, you’ll learn the secrets to reviving and preserving your vehicle’s natural beauty.
Like a painter revealing the vibrant colors of a masterpiece, hand waxing will bring out the hidden brilliance of your car’s exterior.
This expert guide will take you step-by-step through the process, from preparing the surface to achieving a glossy finish.
With regular maintenance and the right techniques, you’ll keep your car shining like new for years to come.
Say goodbye to dullness and hello to a car that truly shines!
Key Takeaways
- Hand waxing is essential for maintaining the overall appearance and durability of your car.
- Regular hand waxing prevents paint fading, oxidation, and UV damage.
- Hand waxing enhances the brilliance and luster of your car’s paint.
- Hand waxing provides a protective barrier against dirt, dust, and UV rays.
I. Introduction
Start your car care journey by understanding the importance of hand waxing and how it can reveal the true brilliance of your vehicle.
Waxing your car by hand isn’t just a chore, but an art that brings out the shine and protection your car deserves. Unlike machine application, hand waxing allows you to carefully apply the wax, ensuring every inch of your car is covered.
The process involves using a high-quality wax specifically made for cars, which creates a protective barrier against the elements. Hand waxing also enhances the natural color and depth of your car’s paint, giving it a stunning, showroom finish.
A. Importance of car maintenance and preservation
To maintain and preserve your car, it is essential to prioritize regular and thorough maintenance. Vehicle maintenance goes beyond just ensuring the engine is running smoothly; it also includes taking care of the exterior to enhance its overall appearance and durability. Hand waxing is a crucial step in this process as it not only protects the paint from harmful elements but also enhances its gloss, making your car shine like new. By regularly waxing your car, you can prevent paint fading, oxidation, and other damages caused by UV rays, dirt, and moisture. This simple yet effective practice can vastly improve the paint condition and increase your car’s resale value. So, invest in regular hand waxing and unleash the hidden brilliance of your car!
| Benefits of Hand Waxing | Emotional Response | Keywords |
|---|---|---|
| Enhanced gloss | Increased pride | Gloss enhancing, paint condition |
| Improved durability | Sense of protection | Durability, vehicle maintenance |
| Enhanced paint condition | Satisfaction | Hand waxing, paint condition |
B. Benefits of hand waxing
Enhance the brilliance of your car with hand waxing, unlocking numerous benefits for its appearance and protection.
Hand waxing involves the manual effort of applying a layer of car polish to the exterior surface of your vehicle. This process not only enhances the shine and luster of your car’s paint, but it also provides a protective barrier against environmental contaminants, such as dirt, dust, and UV rays.
The application of hand waxing can significantly extend the longevity of your car’s paint, preventing it from fading or oxidizing over time.
Additionally, hand waxing is an essential part of regular vehicle care, as it helps maintain the overall condition and value of your car.
II. Preparing the car surface
Get your car surface ready for hand waxing by carefully cleaning and removing any debris. Start by washing your vehicle with a mild car shampoo to remove dirt and grime. Pay special attention to areas like the hood, roof, and sides where debris tends to accumulate. After rinsing, use a soft microfiber cloth or sponge to dry the car completely.
Next, inspect the surface for any imperfections or scratches. If necessary, you can use a light compound or polish to restore the gloss and smoothness of the clear coat. Once the surface is clean and smooth, you’re ready for hand waxing.
Remember to use a high-quality car wax and apply it in small circular motions, using a hand buffing pad or cloth. Following these steps will ensure a flawless finish and protect your vehicle’s paint for a long time.
Don’t forget, regular maintenance and proper automotive care are essential to keep your car looking its best.
A. Cleaning the car thoroughly
Clean your car thoroughly by removing all dirt and debris from the surface. Start by rinsing your car with water to loosen any dirt or grime.
Then, use a gentle car wash soap and a soft sponge or microfiber cloth to scrub the entire surface of your car. Pay extra attention to areas that tend to accumulate more dirt, such as the wheel wells and lower parts of the car.
Rinse off the soap and dry your car with a clean, lint-free towel.
To achieve a finished look, apply tire shine to your tires using a hand process. This will give them a glossy and polished appearance.
Cleaning your car thoroughly is essential before proceeding with the hand waxing process, as it ensures that the wax adheres properly and enhances the overall shine of your vehicle.
B. Removing any contaminants
To prepare your car for hand waxing, it’s important to eliminate any contaminants that may hinder the wax’s effectiveness. Here are some steps to remove these contaminants:
- Wash your car thoroughly using a high-quality car wash soap. This will remove any dirt, grime, and road debris that may have accumulated on the surface.
- Clay bar your car to remove any embedded contaminants such as tree sap, tar, or industrial fallout. The clay bar will gently lift these contaminants, leaving your car’s surface smooth and ready for waxing.
- Use a degreaser or tar remover to target any stubborn grease or tar spots. Apply the product to a microfiber cloth and gently rub the affected areas until the contaminants are dissolved.
- Finally, inspect your car’s surface for any remaining contaminants. If you notice any stubborn stains or marks, use a specialized cleaner or polish to remove them before applying the wax.
C. Ensuring a dry surface
Make sure your car’s surface is completely dry before applying the wax. Moisture on the surface can prevent the wax from adhering properly, resulting in an uneven finish. To ensure a dry surface, you can use a microfiber cloth or a soft, lint-free towel to gently remove any water droplets or moisture. Pay special attention to areas where water tends to accumulate, such as the windows, mirrors, and crevices. It is also important to wait for a dry weather condition before waxing your car. Waxing on a rainy or humid day can trap moisture under the wax, leading to a dull and hazy appearance. Take your time and make sure the surface is thoroughly dry to achieve the best results.
| Areas to Check for Moisture | Best Practices |
|---|---|
| Windows and Mirrors | Use a dry cloth to wipe away any water droplets. |
| Crevices and Seams | Use a soft brush to remove any trapped moisture. |
| Undercarriage | Allow the car to dry completely before waxing. |
III. Selecting the right wax
When selecting the right wax for your car, it’s important to consider your specific needs and preferences. Not all waxes are created equal, and finding the one that suits your car’s paint and your desired level of shine is essential. Here are a few factors to keep in mind when making your decision:
- Type of wax: Choose between carnauba wax, synthetic wax, or a hybrid of both. Carnauba wax offers a deep, warm glow, while synthetic wax provides longer-lasting protection.
- Ease of application: Look for a wax that’s easy to apply and buff off, saving you time and effort.
- Durability: Consider the longevity of the wax and how often you’re willing to reapply it.
- Additional features: Some waxes come with added UV protection, water beading properties, or scratch resistance for extra benefits.
With these factors in mind, you can select the right wax that will unleash the hidden brilliance of your car.
A. Considering the type of wax suitable for the car’s paint
Choose the wax that best complements your car’s paint to achieve optimal results. The type of wax you use will depend on the specific needs of your car’s paint job. Consider factors such as the age of the paint, its condition, and the level of protection you desire. Here is a table that can help you make an informed decision:
| Type of Wax | Benefits |
|---|---|
| Carnauba Wax | Provides a deep, warm shine and strong protection against UV rays. |
| Synthetic Wax | Offers longer-lasting protection and is easier to apply and remove. |
| Polymer Sealant | Provides exceptional durability and protection against environmental contaminants. |
| Spray Wax | Convenient and quick to use for maintaining a glossy finish between wax applications. |
| Hybrid Wax | Combines the benefits of both synthetic and natural waxes for a high-quality shine and durability. |
B. Choosing a high-quality wax for better results
Looking for the best way to achieve superior results when waxing your car by hand? Wondering which high-quality wax will give you the best shine and protection? Choosing the right wax is crucial to getting the desired results. Here are some factors to consider when selecting a high-quality wax:
- Type of wax: Look for a wax that matches your car’s paint type, whether it’s clear coat, enamel, or metallic.
- Ingredients: Check for waxes that contain carnauba, a natural wax that provides a deep, long-lasting shine.
- UV protection: Opt for a wax that offers UV protection to prevent your car’s paint from fading and cracking under the sun.
- Ease of application: Consider waxes that are easy to apply and remove, saving you time and effort.
C. Exploring different wax options available in the market
To find the perfect wax for your car, you should frequently explore the various wax options available in the market. With so many choices out there, it can be overwhelming to determine which wax will give your car that ultimate shine. To help you in your search, here is a comparison table of some popular wax options:
| Brand | Type | Features |
|---|---|---|
| Meguiar’s | Carnauba Wax | Provides deep, wet-look shine |
| Turtle Wax | Synthetic Wax | Long-lasting protection against UV rays |
| Collinite | Paste Wax | Durable, high-gloss finish |
| Chemical Guys | Spray Wax | Easy and quick application, great for touch-ups |
| P21S | Concours Carnauba Wax | Exceptional gloss and protection |
IV. Applying the wax by hand
To apply the wax by hand, start by ensuring that you have a clean and dry surface. This will help the wax adhere better and provide a smoother finish. Here are some steps to follow when applying wax by hand:
- Take a small amount of wax and apply it onto a foam applicator pad.
- Use gentle and even pressure to spread the wax onto the surface of your car in a circular motion.
- Work in small sections to ensure thorough coverage.
- Let the wax dry to a haze before buffing it off with a clean microfiber cloth.
By following these steps, you can achieve a professional-looking shine and protect your car’s paint for longer.
Remember to take your time and enjoy the process of hand waxing your car, as it can be a therapeutic and rewarding experience.
A. Using the appropriate applicator
Choose a foam applicator pad as the appropriate applicator for applying wax by hand. Foam pads are a popular choice among car enthusiasts because they provide an even application of wax and are gentle on the car’s paint. They are also easy to handle and can be used on both smooth and textured surfaces.
To help you understand why foam applicator pads are the best choice, let’s compare them to other types of applicators:
| Applicator Type | Pros | Cons |
|---|---|---|
| Foam Pad | Even application, gentle on paint, easy to handle | Can absorb excess wax |
| Microfiber Cloth | Soft, lint-free, reusable | Can leave streaks if not used properly |
| Sponge | Affordable, easy to find | Can scratch paint if not cleaned properly |
B. Applying the wax in small sections
Now, let’s further enhance your wax application technique by consistently applying the wax in small sections. This ensures an even and thorough coverage on every part of your car’s surface. By following this method, you’ll achieve a flawless finish that will make your car shine like never before.
Here are some key points to keep in mind:
- Divide your car into small sections, such as the hood, roof, doors, and trunk.
- Apply a thin layer of wax to each section using a circular motion.
- Work on one section at a time, ensuring that you cover every inch.
- Use a clean microfiber cloth to buff the wax off after it has dried.
C. Ensuring even distribution and coverage
Ensure a thorough and even distribution of wax by applying it in small sections, allowing for complete coverage of your car’s surface. This step is crucial in achieving a flawless and long-lasting shine.
Begin by selecting a small area, such as the hood or a door panel, to focus on. Apply a thin layer of wax using a clean, soft cloth or applicator pad. Use gentle, circular motions to spread the wax evenly over the surface. Be sure to cover every nook and cranny, including edges and crevices.
Continue this process, working in small sections, until the entire car is covered. By taking your time and ensuring even distribution, you’ll maximize the brilliance of your car’s finish and protect it from the elements.
V. Allowing the wax to dry
After applying a thin layer of wax to your car’s surface, it’s important to allow it to dry completely before moving on to the next step. This drying process is crucial as it allows the wax to bond with the paintwork, providing a protective layer and enhancing the shine of your vehicle.
To ensure the wax dries effectively, follow these steps:
- Find a cool, shaded area to park your car. Direct sunlight can cause the wax to dry too quickly and become difficult to buff off.
- Wait for the wax to haze over. This usually takes around 10-15 minutes, but it may vary depending on the type of wax used.
- Use a clean, dry microfiber cloth to gently wipe off the hazy residue. Apply light pressure and use circular motions for best results.
- Check for any remaining residue and repeat the process if necessary.
A. Giving sufficient time for the wax to bond with the paint
To achieve optimal results, give the wax sufficient time to bond with the paint of your car. This step is crucial in ensuring a long-lasting and effective wax job.
After applying the wax, it’s important to let it sit on the surface for a recommended period of time. This duration allows the wax to adhere to the paint, creating a protective layer that enhances the shine and protects against environmental elements.
Rushing this process can lead to unsatisfactory results, as the wax needs time to bond and harden properly. By giving the wax enough time to bond with the paint, you’re allowing it to work its magic and unleash the hidden brilliance of your car’s exterior.
B. Avoiding contact or exposure to moisture during the drying process
To achieve optimal results, it’s important to avoid contact or exposure to moisture during the drying process, ensuring the wax bonds effectively with the paint of your car. Here are some tips to help you avoid moisture and maximize the effectiveness of your hand waxing:
- Park your car in a covered or shaded area to prevent rain or dew from settling on the surface.
- Before waxing, make sure your car is completely dry. Use a microfiber cloth or air blower to remove any lingering moisture.
- Avoid waxing your car on humid or rainy days, as moisture in the air can interfere with the bonding process.
- Be cautious when washing your car after waxing. Use a gentle hand wash or low-pressure hose to avoid saturating the waxed areas.
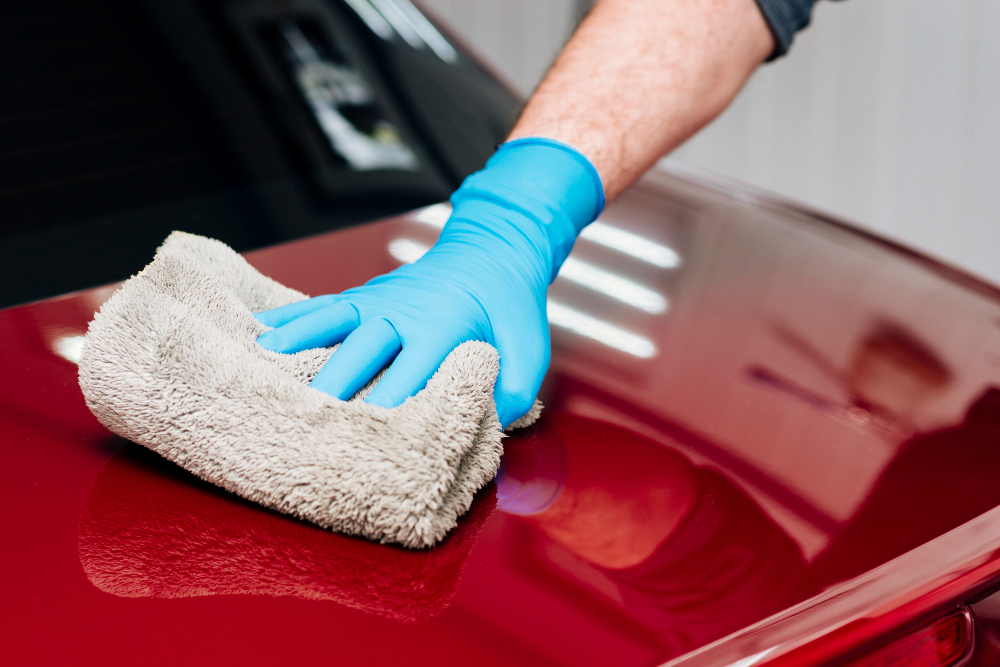
VI. Buffing the wax
Once the wax has dried completely, gently buffing the surface with a soft microfiber cloth will bring out the ultimate shine of your car. Buffing is a crucial step in the waxing process as it helps to remove any excess wax residue and evenly distribute the remaining wax.
To start, fold the microfiber cloth into a square and hold it firmly in your hand. Using light pressure, make small circular motions on the waxed surface. Be sure to cover the entire area to ensure a uniform shine.
As you buff, you’ll notice the wax transforming into a glossy finish, enhancing the brilliance of your car’s paintwork. Remember to maintain a steady and consistent motion to avoid streaks or unevenness.
Once you’ve completed the buffing process, stand back and admire the stunning shine that your car now radiates.
A. Using a clean and soft microfiber cloth
First, grab a single clean and soft microfiber cloth. This cloth will be your trusted companion in bringing out the hidden brilliance of your car’s exterior. Here’s how to use it effectively:
- Gently fold the microfiber cloth into a manageable size, ensuring that you have a clean surface to work with.
- Apply a small amount of wax onto the cloth, spreading it evenly and thinly over the desired area.
- Using light pressure, work the wax into the paintwork using circular motions. This helps the wax to adhere properly and ensures an even application.
- As you work, periodically check the cloth for any debris or build-up. If necessary, switch to a fresh section of the cloth to avoid scratching the surface.
B. Applying gentle pressure in circular motions
As you continue working with the clean and soft microfiber cloth, apply gentle pressure in circular motions to effectively work the wax into the paintwork and achieve a flawless finish.
This technique helps to evenly distribute the wax and ensure that it penetrates the surface of your car.
By applying gentle pressure, you allow the wax to bond with the paint, creating a protective layer that enhances the shine and provides long-lasting protection against dirt, UV rays, and other environmental elements.
Remember to maintain a consistent speed and pressure as you move your hand in circular motions, working on one section at a time.
This method not only helps to remove any leftover residue but also enhances the overall appearance of your car, giving it a showroom-worthy finish.
C. Achieving a glossy finish by removing excess wax
To achieve a glossy finish on your car, use a clean microfiber cloth to remove any excess wax. This step is crucial in bringing out the true brilliance of your vehicle’s paintwork.
Here are some key points to keep in mind while removing excess wax:
- Gently wipe the surface in straight lines, working in small sections at a time.
- Apply light pressure to avoid scratching the paint.
- Use a folding technique to ensure you’re always working with a clean section of the cloth.
- Pay extra attention to crevices and hard-to-reach areas to ensure all wax residue is removed.
VII. Post-wax care
After waxing your car, it’s essential to take proper care to maintain its shine and protect the paintwork. One crucial step in post-wax care is to avoid washing your car for at least 24 hours. This allows the wax to cure and bond to the paint surface, ensuring long-lasting protection.
When it’s finally time to wash your car, use a gentle car wash soap and a soft microfiber sponge or mitt to prevent scratching the waxed surface. Avoid abrasive brushes or sponges that can damage the wax layer.
After washing, it’s vital to dry your car thoroughly to prevent water spots. Use a clean microfiber towel or a leaf blower to remove excess water.
Lastly, regularly applying a spray detailer or quick wax can help maintain the shine and extend the life of the wax.
A. Regular maintenance to preserve the wax’s durability
To preserve the durability of the wax, regularly maintain your car with simple steps. By following these maintenance practices, you can ensure that your car’s wax will last longer and continue to protect your vehicle’s paintwork:
- Wash your car regularly using a pH-neutral car shampoo to remove dirt and contaminants that can degrade the wax.
- Dry your car thoroughly with a microfiber towel to prevent water spots and mineral deposits from forming on the surface.
- Avoid parking your car under direct sunlight for extended periods as the heat can cause the wax to melt and lose its protective properties.
- Apply a spray wax or quick detailer in between waxing sessions to boost the shine and protection of the existing wax layer.
B. Avoiding abrasive cleaning products
Maintain the integrity of your car’s wax by steering clear of abrasive cleaning products. These products can strip away the protective layer of wax, leaving your car vulnerable to damage from the elements.
Instead, opt for gentle cleaning solutions that are specifically designed for car surfaces. Look for pH-balanced cleaners that are non-abrasive and won’t harm the wax.
When choosing cleaning tools, avoid abrasive brushes or scrubbing pads that can scratch the paintwork. Instead, use soft microfiber cloths or sponges to gently remove dirt and grime.
Remember to rinse your car thoroughly after washing to remove any residue.
Conclusion
In conclusion, hand waxing your car is a simple yet effective way to revive its brilliance and protect it from environmental damage.
By following proper car maintenance and preservation practices, such as regular cleaning and post-wax care, you can ensure the longevity of your wax and keep your car looking its best.
So, grab your wax and unleash the hidden brilliance of your ride today!